Appearance
MCP Server 服务端
前置阅读:
# 1. 如何配置?
① 在项目的 application.yaml 中,配置 spring.ai.mcp.server 配置项,开启 MCP Server ,如下所示: spring: ai: mcp: server: enabled: true name: yudao-mcp-server version: 1.0.0 instructions: 一个 MCP 示例服务 sse-endpoint: /sse 友情提示: 具体每个配置项的作用,可见 《Spring AI 官方文档 —— MCP Client Client Starter》 文档。 ② 使用 “Functions as Tools” 的方式,编写 MCP Server 的工具。 例如说:cn.iocoder.yudao.module.ai.tool.method 包下的 Person、PersonService、PersonServiceImpl 类。 ③ 在 AiAutoConfiguration 的 #toolCallbacks(...) 方法,注册 MCP Server 的工具。 例如说:PersonService Bean 。 接着启动后端项目,可以看到 INFO o.s.a.m.s.autoconfigure.McpServerAutoConfiguration 日志,表示 MCP Client 启动成功。
# 2. 如何测试?
① 找一个支持 MCP Server 的工具,例如说 Cursor 或者 Claude 等。这里使用 Cursor,例如说: { "mcpServers": { "yudao-mcp-server": { "url": "http://127.0.0.1:8089/sse" } } } ② 在 Cursor 输入 “查下 1 这个 person” 消息,触发 MCP Server 的调用。如下图所示: 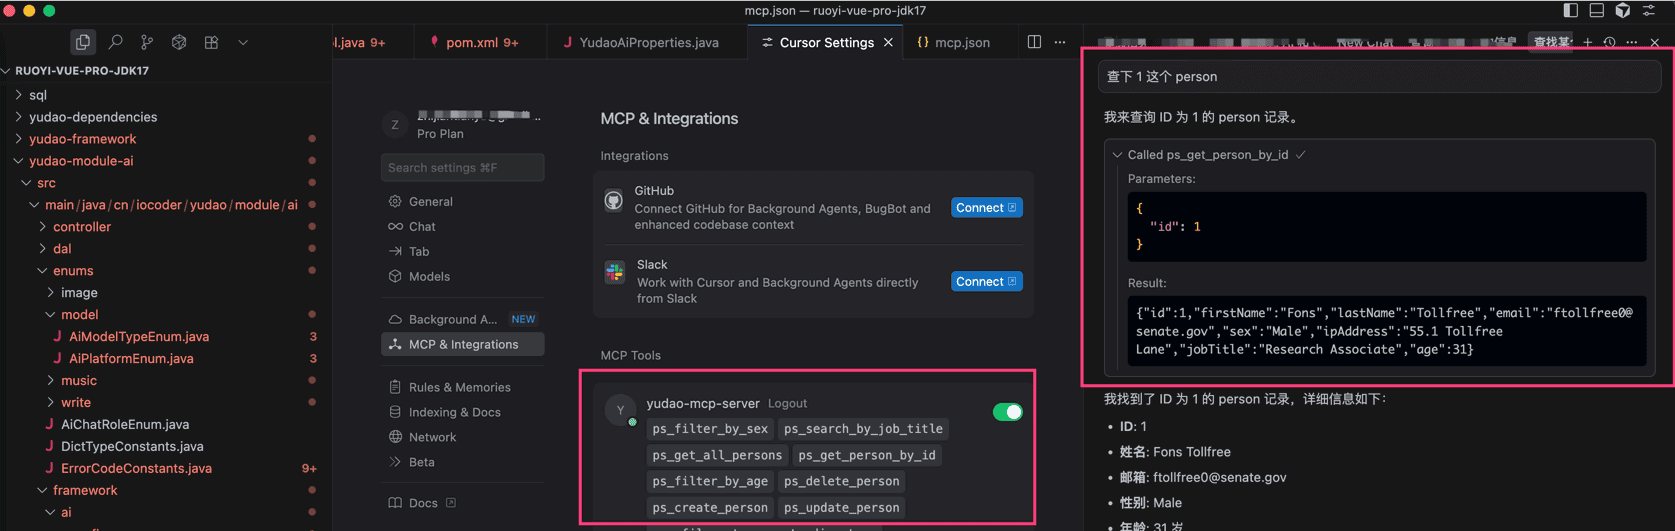 .pageB img{width:80px!important;} .wwads-horizontal .wwads-text, .wwads-content .wwads-text{line-height:1;} MCP Client 客户端 【模型接入】Claude ← MCP Client 客户端 【模型接入】Claude→ Theme by Vdoing | Copyright © 2019-2026 芋道源码 | MIT License
- 跟随系统
- 浅色模式
- 深色模式
- 阅读模式 × .windowRB{ padding: 0;} .windowRB .wwads-img{margin-top: 10px;} .windowRB .wwads-content{margin: 0 10px 10px 10px;} .custom-html-window-rb .close-but{ display: none; }